
Setting up the sevDesk integration and testing the connection
The sevDesk integration connects your sevDesk account to easycompliance so that your contacts are added to monitoring automatically. Once set up, the rule is: “easycompliance automatically synchronises your contacts with sevDesk every night.” You only need one API token from sevDesk for this.
Step by step
- Find the API token in sevDesk. Sign in to sevDesk and open Settings → Users. Select an administrator user. In the window that opens you will find the API token field. Click Show and copy the token.
- Enter the token in the customer portal. Open the “sevDesk Integration” page in the easycompliance customer portal. Paste the copied token into the “sevDesk API Token” field. (Use the eye icon next to the field to show or hide the token.)
- Activate the integration. Set the “Integration active” field to “Yes” so that the nightly synchronisation runs.
- Save first. Click “Save”. You will see the confirmation: “Data saved successfully. Please test the connection.”
- Then test the connection. The “Test connection” area only appears after the first save, with the note “After saving, you can test the connection to sevDesk.” Click the “Test connection” button there.
- Check the result. On success you will see: “Connection to sevDesk successful. Your contacts will be imported automatically every night, provided you activate the integration.” From then on, easycompliance adds your contacts to monitoring automatically every night.
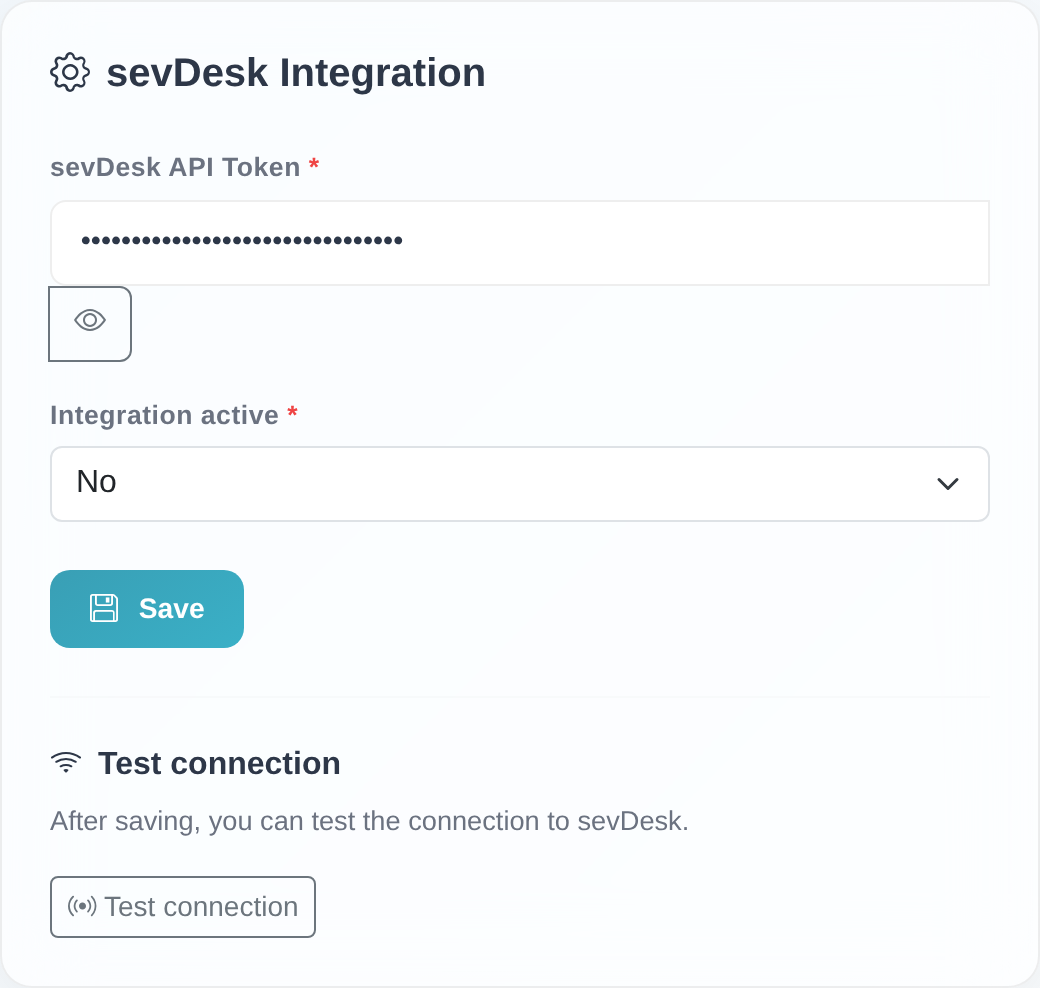 The “sevDesk Integration” page with the “sevDesk API Token” field, the “Integration active” selector and – after the first save – the “Test connection” button.
Good to know
- Only one token needed. Unlike the Collmex integration, sevDesk does not require a multi-field login, only the API token. There are no separate fields for user, password or company number.
- Contacts are synchronised. From sevDesk, your contacts are imported (with Collmex it is customers and suppliers).
- Order matters. The “Test connection” button only appears after the first save – and only if a token is stored. So always save first, then test.
- Nightly synchronisation. The import runs automatically every night – not immediately after saving or testing.
- Don’t forget to activate. Your contacts are only imported at night if “Integration active” is set to “Yes”. A successful connection test alone does not start the synchronisation.
Frequently asked questions
Where do I find my sevDesk API token? In sevDesk under Settings → Users. Select an administrator user, click Show in the API token field and copy the token.
Why don’t I see a “Test connection” button? The button only appears after the first save and only if a token is entered. First enter your token, click “Save”, and the “Test connection” area becomes visible.
I get the message “Connection to sevDesk failed.” The full message reads: “Connection to sevDesk failed. Please check your API token.” Make sure you copied the token completely and without spaces, and that it belongs to an administrator user. Save it again and run the test once more.
What does “Connection test not available.” mean? This message indicates a technical problem on our side. In this case, please contact customer service.
When saving, I see “Error while saving. Please contact customer service.” This means your data could not be saved. Try again; if the error persists, contact customer service.
Are my contacts imported immediately? No. After successful setup and with the integration active, your contacts are imported automatically every night.
Requirements
- A sevDesk account with an administrator user through whom you can view the API token.
- Your sevDesk API token (see step 1 below).
- You find the integration page in the customer portal in the Integrations area under “sevDesk Integration”.
Related articles
Last reviewed: