
Importing records from a file (CSV, Excel)
You add many business partners to your monitoring list at once by uploading a file. A guided three-step wizard uploads the file, shows a preview and hands the data over to ongoing monitoring – across all modules (sanctions lists, PEP, Dow Jones).
Important first – the import runs in the background: there is no immediate result. After you start the import, you see the confirmation “Import prepared”. Your file is then processed automatically; once it is finished you receive a confirmation email with the import details.
Step by step
Step 1 – Upload the file
- Open your monitoring list and choose “Import records”. The wizard opens with “Step 1: Upload file”.
- Read the info box: it states the “Supported formats:”, the “Maximum file size:” and the recommended “Character set:” (UTF-8).
- Drag your file into the “Drop file here” area, or click “Select file” and pick it.
- As soon as a valid file is selected it is analysed automatically (it shows “Analysing file …”) and you go straight to step 2. You only need the “Continue to preview” button if the automatic forwarding does not happen.
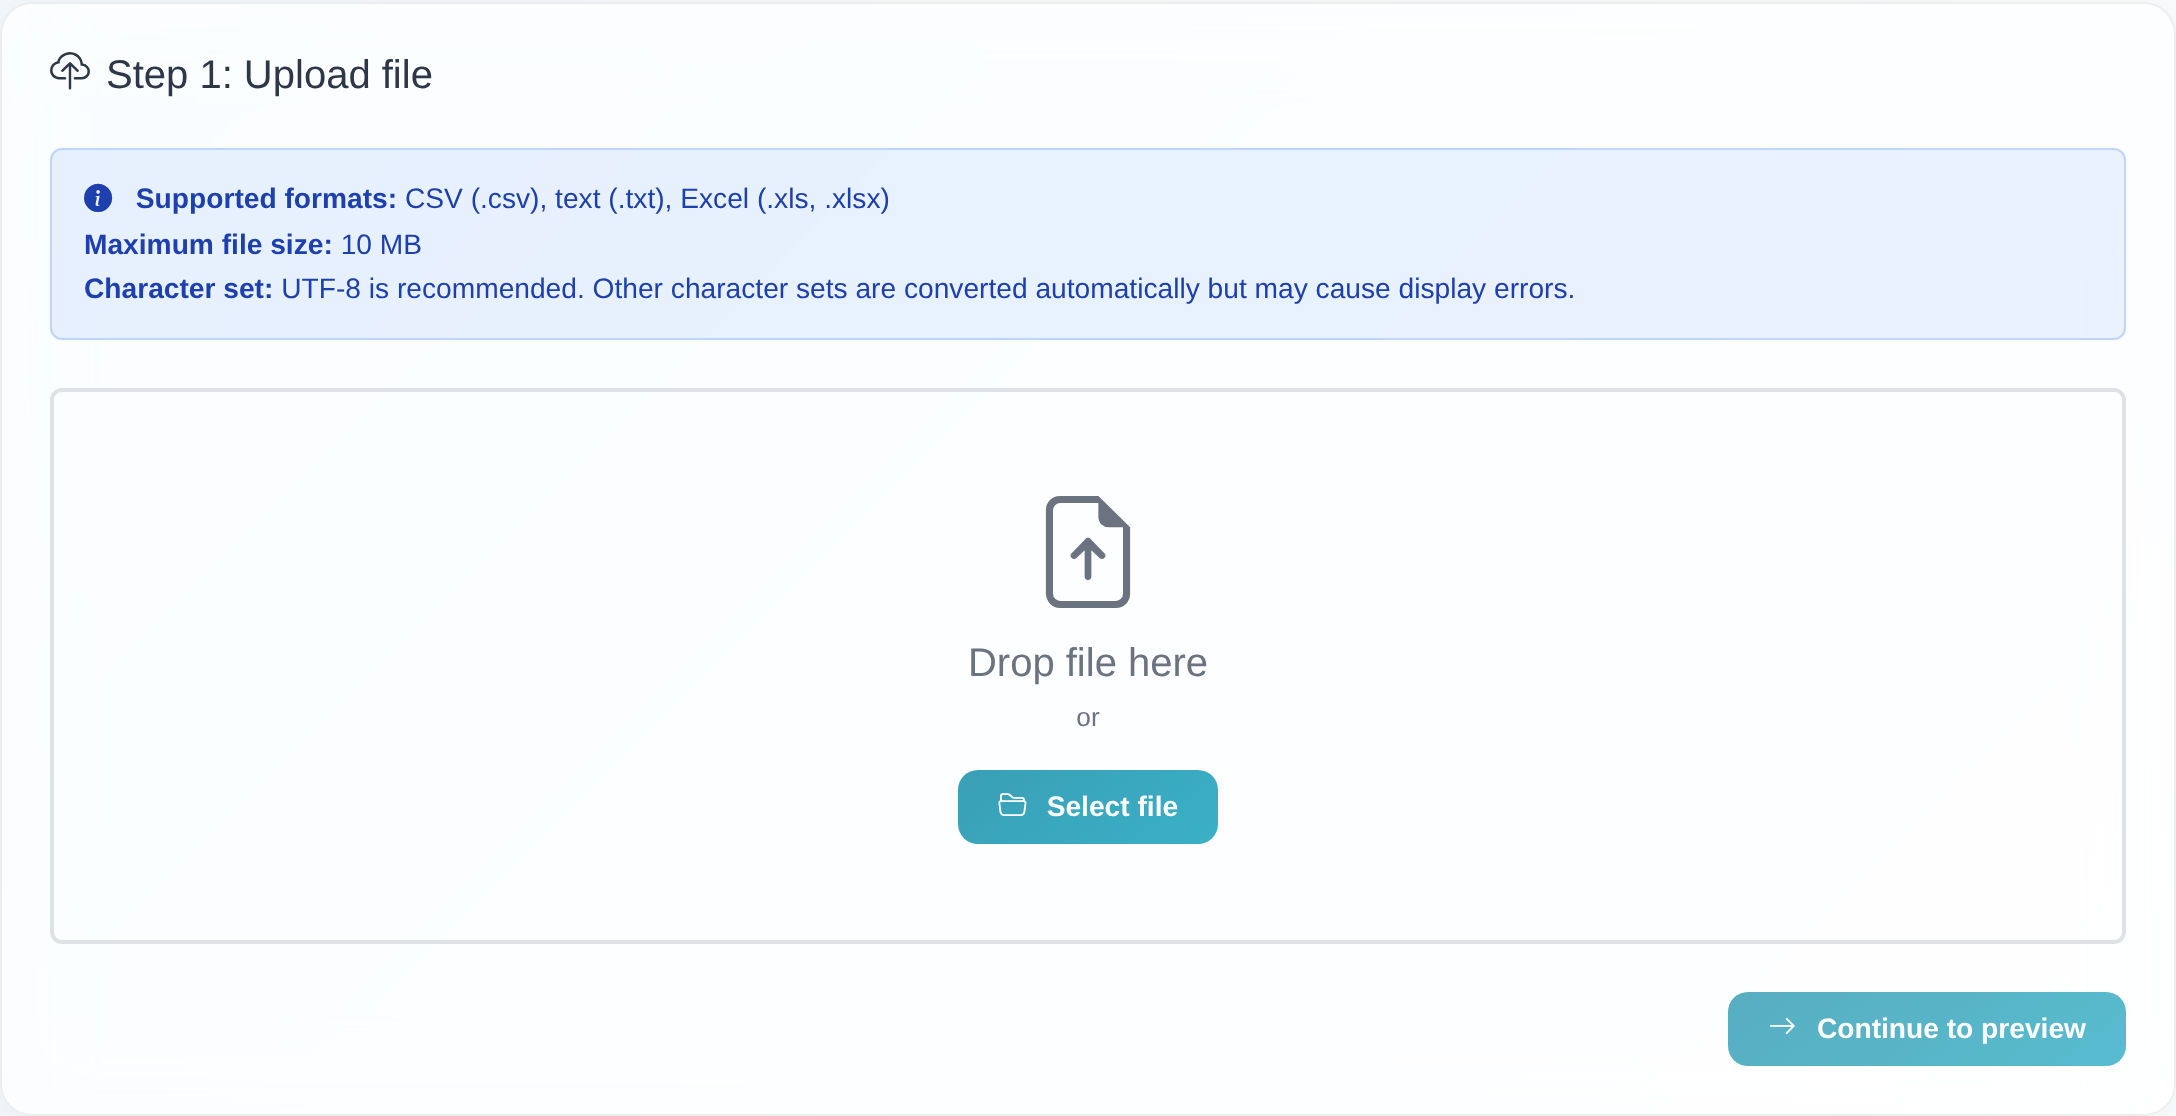 Step 1: drop the file via drag and drop or upload it through “Select file” – analysis starts automatically.
Step 2 – Check the preview and map columns
In “Step 2: Preview & options” you see the first rows of your file under “Preview (first 10 rows)”. The delimiter is detected automatically.
- Confirm the header: if a header row was detected, the option “First row is a header” is enabled. Keep it ticked when the first row contains column headers; otherwise clear the checkbox.
- Map the name column (required, marked with
*) under “Column mapping”:- “One column”: choose the column that holds the full name or company name.
- “Combine columns”: for separate columns (e.g. first name and last name). You map the “First column (first name)” and the “Second column (last name)”; both are joined with a space into a single name.
- The columns are labelled “Column A”, “Column B” and so on – matching the headers in the preview table, so you do not have to count.
- Reference column (optional): under “Reference column (optional)” you can choose a column for your internal reference. It is used for matching and later appears in reports. Leave “– No reference –” selected if you do not need one.
- Set the duplicate options: the option “Skip duplicates (recommended)” is usually pre-selected. When it is active, choose whether duplicates are detected “By name” (default) or “By reference”. For details see Avoiding duplicate entries on import.
- Click “Start import”.
 Step 2: check the preview, confirm the header, map the name and reference columns, set the duplicate options.
Step 3 – The “Import prepared” confirmation
After you start, the confirmation “Import prepared” appears, noting that your file was uploaded successfully and will be processed automatically within the next few minutes. Once it is finished you receive a confirmation email with the import details. From here you return to your monitoring list via “View list” or start a new import via “Import another file”.
Good to know
- Asynchronous processing: because the import runs in the background, the new records do not appear in the list right away. How many records were imported or skipped is shown in the confirmation email.
- Excel is converted automatically:
.xlsand.xlsxfiles are internally converted to CSV before import. The first worksheet is used. - The preview shows at most 10 data rows – regardless of how many records the file contains in total. The complete file is imported.
- Upload error messages:
- “Please select a file.” – no file was selected.
- “Invalid file format. Allowed: .csv, .txt, .xls, .xlsx” – the format is not supported.
- “The file is not a valid CSV, TXT or Excel file (binary data detected). Please upload a valid file.” – the file contains no readable text data.
- Module dependency: which list you import into (sanctions lists, PEP or Dow Jones) depends on the module you start the import from and on the modules enabled for your tenant.
Frequently asked questions
Why don’t I see a result after the import? The import runs in the background. After you start it, you only see the “Import prepared” confirmation. The file is processed within the next few minutes; a confirmation email then tells you the result.
Which file formats can I upload?
CSV (.csv), text (.txt) and Excel (.xls, .xlsx). These formats are also listed in the
info box of the upload step under “Supported formats:”.
How large may the file be? The current maximum is shown in the upload step under “Maximum file size:”. Stay within the value displayed there.
My name is split across two columns (first name and last name). What do I do? In step 2, choose “Combine columns” and map the “First column (first name)” and the “Second column (last name)”. Both are joined with a space into a single name.
Do I have to provide a reference column? No, it is optional. A reference helps with internal matching and appears in reports. If you don’t need one, leave “– No reference –” selected.
I get a message that I don’t have permission. Importing requires write permission for lists (“Edit lists”). If it is missing, the message “You do not have permission to edit lists.” appears – contact your tenant’s main access or customer service.
Requirements
- Write permission for lists (the “Edit lists” permission). Without it, the message “You do not have permission to edit lists.” appears.
- Supported formats: CSV (
.csv), text (.txt), Excel (.xls,.xlsx). - The upload step shows a maximum file size – stay within the value shown there.
- Character set: UTF-8 is recommended. Other character sets are converted automatically but may cause display errors.
Related articles
- Avoiding duplicate entries on import
- Adding names to your monitoring list
- Understanding the data quality analysis
Last reviewed: